I get a “I’m locked out of my WordPress admin” message roughly once a month, and the failure mode is almost always one of three things: the password manager lost the entry, the reset email is being eaten by a misconfigured SMTP plugin, or the original admin account was compromised and someone rotated the credentials and email out from under the owner. All three resolve to the same fix: get back in through the database, then clean up. WordPress admin recovery is mostly a question of which path is open to you on the day it breaks.
This post is the exact recovery procedure I run, in the order I’d try it in a real incident. WP-CLI first when SSH is alive, phpMyAdmin and direct SQL second when it isn’t, and a clean “create a new admin from scratch” fallback when the existing user is unsalvageable. About fifteen minutes from a locked-out site to a working admin session, assuming the database itself is intact.
Get the recovery right and the rest, hardening, plugin cleanup, audit log review, becomes the actual work. Get the recovery wrong and you’ll be restoring from a backup at 2am.
Before you touch anything: snapshot the database
I have made every mistake on this list at least once, and the one that hurts most is not running a database snapshot before editing wp_users or wp_usermeta. An UPDATE without a WHERE rewrites every user’s password to the same string. A bad INSERT into wp_usermeta can leave the table in a state plugins choke on. Restoring a 200MB database from a backup takes ten minutes; explaining to a client why their entire user base lost their passwords takes considerably longer.
Snapshot the database before any of the procedures below. On a managed host that’s usually a one-click backup. On a self-managed VPS:
mysqldump -u root -p wordpress_db > wordpress_db_pre_recovery.sqlReplace wordpress_db with the actual database name from wp-config.php. Keep the dump until you’ve verified the recovery worked end-to-end. Don’t skip this step “because it’s just a small change”. The cost of a snapshot is a few seconds; the cost of skipping it once is a story you’ll tell for years.
The clean path: WP-CLI when SSH still works
If you have SSH access and WP-CLI installed (most managed hosts ship it; on a self-managed VPS, you’ve usually installed it yourself), forget phpMyAdmin entirely. WP-CLI hits WordPress’s own functions, so the password gets hashed correctly with PHPass on the way in, and you don’t risk a typo wrecking the table.
From the WordPress install directory:
wp user listThat gives you the user ID, login, email, and role for every account. Pick the admin you want to reset. Then:
wp user update 1 --user_pass='ANewStrongPasswordHere'Replace 1 with the actual user ID. The command writes a properly hashed password into wp_users.user_pass and you can log in immediately at /wp-login.php.
If the original admin account is compromised and you want a brand-new one, skip the reset and create a fresh administrator:
wp user create simon simon@example.com --role=administrator --user_pass='ANewStrongPasswordHere'That single command writes the wp_users row, both wp_usermeta rows (capabilities and user level), and returns the new user ID. No raw SQL, no MD5 dropdown, no risk of forgetting the second meta row.
WP-CLI is the right tool for almost every recovery scenario where the server is still reachable. The phpMyAdmin path below is for the cases where SSH is locked, the host doesn’t ship WP-CLI, or you’re recovering from a hosting panel that only exposes the database.
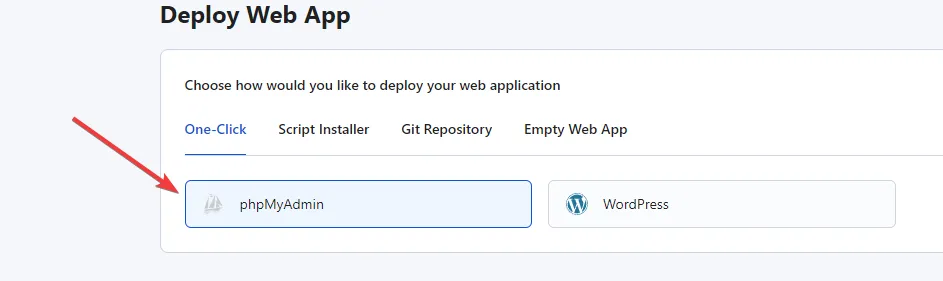
A hosting control panel installing phpMyAdmin next to the WordPress application. On most stacks this is a one-click step; the screenshot is from RunCloud, but cPanel, Plesk, CyberPanel, and Webmin all expose the same flow.
Resetting the password through phpMyAdmin
When SSH and WP-CLI aren’t available, phpMyAdmin is the next best path. The trick that makes this work is that WordPress accepts an MD5-hashed password on a legacy login, then silently rehashes it to PHPass on the next successful authentication. So you don’t need to know how to generate a PHPass hash by hand; you write the new password as MD5, log in once, and WordPress upgrades the hash itself.
First, get the database credentials. They live in wp-config.php at the WordPress root:
define( 'DB_NAME', 'wordpress_db' );
define( 'DB_USER', 'wp_user' );
define( 'DB_PASSWORD', 'the_actual_password' );
define( 'DB_HOST', 'localhost' );
$table_prefix = 'wp_';
The $table_prefix line matters. The default is wp_, but a security-conscious admin or a security plugin will often have changed it to something like wpx9_ or wp_a1b2c3_. Every reference to wp_users and wp_usermeta below must use whatever prefix is actually set.
Steps in phpMyAdmin:
- Log in to your phpMyAdmin instance.
- Select the WordPress database from the left sidebar.
- Open the
wp_userstable (substitute your actual prefix). - Find the admin row, click Edit.
- In the
user_passfield, paste the new plaintext password and pick MD5 from the Function dropdown next to it. - Click Go.
Warning: Confirm you’re editing exactly one row. If you accidentally run an UPDATE in the SQL tab without a WHERE clause, every user on the site gets the same password. The Edit form’s built-in WHERE protects you from this, but the moment you switch to writing raw UPDATE statements, double-check the clause.
If you’d rather run the SQL directly:
UPDATE wp_users
SET user_pass = MD5('ANewStrongPasswordHere')
WHERE user_login = 'admin';
Run a SELECT first to confirm the WHERE matches a single row:
SELECT ID, user_login, user_email FROM wp_users WHERE user_login = 'admin';Once the password is updated, log in at /wp-login.php with the new password. The first successful login replaces the MD5 hash with PHPass automatically, and you’re back in.
Creating a new admin user from scratch
If the existing admin account is compromised, or the password reset doesn’t work, or the user has somehow been demoted out of the administrator role, the cleanest fix is to insert a brand-new administrator straight into the database. This takes three rows: one in wp_users, and two in wp_usermeta.
The trap here is that WordPress doesn’t read the role from wp_users. The role lives entirely in wp_usermeta, in two specific keys: wp_capabilities (a serialized PHP array containing administrator) and wp_user_level (the integer 10). Miss either of those rows and you’ve created a user who can authenticate but has zero permissions in /wp-admin. The login works; nothing else does.
Insert the user row
In phpMyAdmin, open the wp_users table and click Insert. Fill in:
- ID: any unused integer. Run
SELECT MAX(ID) FROM wp_users;first and pick the next number. - user_login: the new username.
- user_pass: the plaintext password. Pick MD5 from the Function dropdown.
- user_nicename: the URL-safe slug, usually the lowercase login.
- user_email: an email you actually control.
- user_registered: the current timestamp (e.g.
2026-04-26 10:00:00). - user_status:
0. - display_name: the human-readable name shown in the dashboard.
Click Go. Note the ID; you need it for the next two rows.
If you’d rather run SQL:
INSERT INTO wp_users
  (user_login, user_pass, user_nicename, user_email, user_registered, user_status, display_name)
VALUES
  ('simon', MD5('ANewStrongPasswordHere'), 'simon', 'simon@example.com', NOW(), 0, 'Simon');

SELECT LAST_INSERT_ID();
LAST_INSERT_ID() returns the ID phpMyAdmin auto-assigned. Save it.
Insert the two usermeta rows
Open wp_usermeta and click Insert. The first row grants the administrator capability:
- user_id: the ID from the previous step.
- meta_key:
wp_capabilities(use your actual prefix if it isn’twp_). - meta_value:
a:1:{s:13:"administrator";b:1;}
The serialized string is the literal value WordPress expects. Don’t add quotes, don’t escape it; paste it exactly as written. Then insert the second row:
- user_id: same ID.
- meta_key:
wp_user_level. - meta_value:
10.
In SQL:
INSERT INTO wp_usermeta (user_id, meta_key, meta_value)
VALUES
  (42, 'wp_capabilities', 'a:1:{s:13:"administrator";b:1;}'),
  (42, 'wp_user_level', '10');
Replace 42 with the user ID from the previous step. If the database prefix isn’t wp_, replace the meta_key strings too: a site with prefix wpx9_ needs wpx9_capabilities and wpx9_user_level. The WordPress core WP_User class reads the meta key by composing $wpdb->prefix . 'capabilities', so the prefix in the meta_key has to match the table prefix exactly.
Log in at /wp-login.php with the new credentials. You should land in the dashboard with full administrator rights.
What to do once you’re back in
Getting the login working is the recovery. The cleanup is the actual incident response, and skipping it is how the same problem comes back next month.
The order I work through it:
- Audit
wp_users. Runwp user list(orSELECT ID, user_login, user_email, user_registered FROM wp_users ORDER BY user_registered DESC;) and look for accounts you didn’t create. Demote anything suspicious to subscriber, change its email to one you control, then delete it once you’re sure it’s not legitimate. - Rotate every secret the compromised admin could touch. Application passwords, plugin license keys, third-party API keys stored in plugin settings, the WordPress salts in
wp-config.php. Treat all of them as exposed. - Check active plugins and themes. Anything you didn’t install, deactivate and inspect. A surprising number of WordPress compromises persist as a single PHP file dropped into
wp-content/plugins/<random-name>/<random-name>.php. - Force a logout for every other session. Either install a “force logout” plugin or just bump the WordPress salts in
wp-config.php. Changing the salts invalidates every existing auth cookie on the site. - Decide whether to recover or rebuild. If the site has been compromised for an unknown length of time, the safer move is usually to spin up a fresh WordPress, restore content from a known-good backup or export, and bring the site back up on clean infrastructure. Patching a compromised install in place is rarely as clean as it looks.
How to make this less likely next time
Most of the recovery jobs I run are preventable. The pattern is almost always the same: weak passwords, a single shared admin account, no 2FA, an SMTP setup that silently dropped the reset email, and wp-config.php permissions loose enough that one shell upload exposed the database credentials.
The hardening that prevents the next lockout is well-trodden ground. The ones that matter most for admin account safety:
- Two-factor on every admin account. A compromised password by itself is a recoverable problem; a compromised password plus access to the email isn’t.
- Working transactional SMTP. Without it the password reset link silently fails, and “I can’t log in” turns into a crisis instead of a five-minute self-service fix.
- A non-shared admin per real human. If two people share an admin account, you can’t tell which one’s credentials leaked, and revoking access requires coordination instead of a delete.
- The broader WordPress hardening pass. I’ve written that up at length in the comprehensive WordPress security guide. Pair it with the Linux server security baseline and the CrowdSec WordPress integration and the categories of attack that lead to “I’m locked out” tickets get a lot quieter.
For agencies running multiple WordPress sites, the per-site hardening matters less than having a documented recovery procedure that any of your team can run in under fifteen minutes. The procedure above is the one I hand to new operators on day one.
Closing the loop
WordPress admin recovery is rarely the hard part of an incident. WP-CLI when SSH is alive, phpMyAdmin with the MD5 dropdown when it isn’t, and a clean three-row INSERT when the existing admin is unsalvageable. Snapshot the database first. Don’t reset the password on a compromised account; create a new admin and audit the old one.
The harder question is what you do once you’re back in. A site that lost its admin once will lose it again unless 2FA, working SMTP, and a per-person admin policy actually land. Recovery is the easy half; preventing the next lockout is the work.
If you’re putting this procedure in your runbook for the first time, the right time to test it is on a staging site, not on the production site at 11pm on a Friday.